Showing posts with label hanuman jayanthi recipes. Show all posts

murukku recipes / murukulu / Jantikalu

0


Jonna Pindi Jantikalu / Jowar Flour Murukku


murukku

After a long time, I could again do my favourite task - posting on my blog. I was down with a severe ear infection and weakness due to which I could not update my blog. I wanted to try my hand at different recipes and post them as soon as possible, but I was so weak that I could not stretch that far. I am so happy that I am back on time, just for the Diwali season. 

jantikalu recipes

Diwali is the most awaited festival of all ages. Children and youngsters wait for the crackers and the elders wait for meeting with relatives and friends. There are many sweets and snacks that are prepared well in advance for the D-Day. Happily sharing the homefoods with your family and friends and having a lovely chit-o-chat give such an immense pleasure. I like whenever I have any relatives or friends visiting my place, especially during the festive season. I have my brothers-in-law, co-sisters, sisters-in-law, co-brothers visiting my place once a year for either Pongal, Dussehra or Deepawali.

jowar murukku recipes

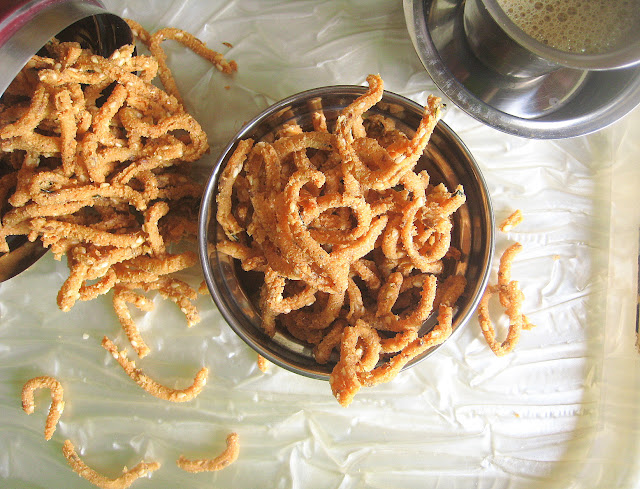
This year I have one sister-in-law and parents-in-law visiting my place for Diwali. Hence this post is dedicated to them. Todays snack is Jantikalu ( in telugu ), Murukulu or also popularly known as chakkilalu. These are fritters which are deep fried in oil. These jantikalu are a highly addictive snack and I bet you cannot stop with just some. I am sure you would ask for more. They are crunchy and tasty and a  perfect tea time or evening snack.

jonna jantikalu recipes

These jantikalu are made with jonna pindi ( in telugu ) or jowar flour. They are very easy and simple to prepare. I could make a bunch of them in just half an hour. Mix in all the necessary ingredients and deep fry. It is as simple as said. These murukulu can be stored for upto 20-30 days Now lets not waste any more time and get straight to the method of preparation.


Preparation


Take jowar flour in a bowl. Add sesame seeds, cumin seeds, ajwain, ginger garlic paste, chilli powder, salt, hing and finely chopped curry leaves.


Mix in well with your fingers or a whisk. Sprinkle hot ghee in the flour and crumble it well.


Once the ghee is evenly distributed with the flour, add hot water in the flour little by little.


Initially mix with a big spoon or ladle to mix. Later mix well with your hand to make a dough.


To check if the dough is of the right consistency, put a portion of the dough in the murukku press and try to make a jantika. If you are able to press it smoothly and easily with not much difficulty, then it is the right consistency. If it is too hard for you to press, then sprinkle little more water and try again. If it becomes very watery, then add more flour and adjust the seasoning as well. Heat oil in a pan for deep frying.


Take a portion of the dough and put it in the murukku press.


The murukku press is easily available in the local market or in any supermarket. Gently press in the hot oil in circular motion to get a round murukku. As soon as you press, you will see enormous bubbles covering the murukku.


Gradually, the bubbles reduce and you will be able to see the chakkali.


Flip to another side and fry until golden brown in colour. Remove with the help of a slotted ladle onto a tissue paper.


Repeat the same with the remaining dough until all used up. Allow the jantikalu to come to room temperature and it is ready to be stored in an airtight container. Of course, you can also serve it immediately as well.


murukulu

Ingredients


Jowar flour  1cup

Oil for deep frying

Cumin Seeds  1 tsp

Sesame Seeds  1 tbsp

Ajwain  1/2 tsp

Chilli powder  1 tsp

Salt  to taste

Hing  pinch

Finely chopped curry leaves  1 sprigs

Ginger garlic paste  1 tsp

Ghee  3tsp


Method


  1. Take all the ingredients except oil and ghee in a bowl and whisk well. 
  2. Sprinkle hot ghee in the flour and mix evenly. 
  3. Add hot water slowly to make it a perfect dough.
  4. Heat oil in a pan for deep frying. 
  5. Put a portion of the dough in the murukku press and make  a murukku in the hot oil.
  6. Fry until golden brown and remove onto an absorbent paper. 
  7. Repeat from step 5 until all the dough is used up.
  8. When the murukku comes to room temperature, store it in an airtight container. 
  9. Can be stored for upto 20-30 days.


Notes


  • You can substitute chilli powder with green chilli paste or add both. 
  • You are always free to increase or decrease the amount of chilli powder and other ingredients as per your desire. 
  • You can skip ginger, but do not skip the garlic paste. It gives a very nice flavour and taste to the jantikalu.
  • Hot ghee is required to add to give a nice crunchiness to the snack. 
  • These type of fritters can be prepared with a combo of various other flours which I will be posting in the near future. 
  • The oil should be just hot enough for deep frying. To know the correct amount of hot, add a small piece of dough in the hot oil. If it comes up gradually, that is the right temperature. If it rises immediately, then it means the oil is very hot. In such a case, you can either reduce the flame or add more oil to bring the oil to the right temperature.


Continue ...

aval kesari / poha kesari

0


Aval Kesari Recipe / Navrathri Specials


aval kesari recipe

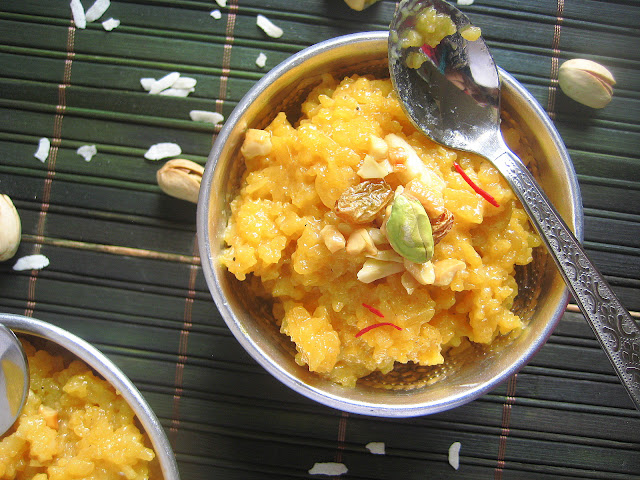
Aval or avalakki or atukulu or flattened rice is the main ingredient for the fourth day of our Navrathri festival. Today's recipe is aval kesari. This is yet another simple dish that can be prepared very easily. This is also one of the beginners dish.

poha kesari recipe

Atukulu kesari is a perfect sweet for this festive season. Atukulu or flattened rice is very light on the tummy and is easily digestible. It is rich in carbohydrates and iron. The best feature of avalakki is it is fat-free. So it is a highly recommended guilt-free snack. You can also check my recipe for poha oats chivda which is yet another healthy guilt-free snack. 


atukulu kesari recipe
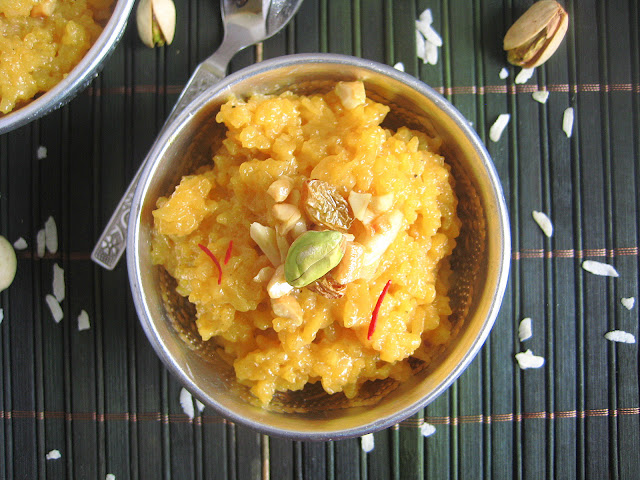
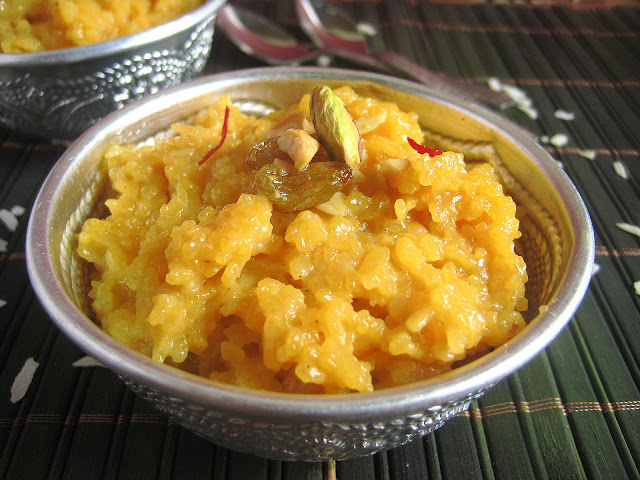
Aval kesari is a slightly chewy sweet made with milk and sugar. It is similar to the paramannnam ( rice payasam ) that we generally prepare during Pongal. I have seen many people preparing this sweet with water, but I prefer to make it milk. This gives a lovely richness to the dish and makes it delicious 😋. The preparation of poha kesari is similar to that of poha payasam or poha kheer, excepting that we do not add any colour to the dish and the consistency varies for each dish.

avalakki kesari recipe

You can add any kind of dry fruits as per your choice to get extra energy from them. I have added raisins, cashews, almonds and pistachios. But you could also include chironji seeds, dates or any other dry fruits as well.


Preparation

Soak almonds in water for 15 minutes. Remove the skin and set them aside. Heat a pan. Add flattened rice and dry roast on a low flame until crisp.


Once the aval has become crisp and you get a nice aroma from it, transfer to another plate.


In the same pan, put ghee.


Roast all the dry fruits that you wish to add. Keep them aside.


In the remaining ghee pour milk. Let the milk get hot.


Meanwhile, crumble the aval into tiny pieces with your hands. Alternately, you can also put in the blender.


Add the crumbled aval and mix well. All the milk will be absorbed by the aval and the aval become soft.


Once cooked and soft, add sugar and colour.


Mix well and sprinkle cardamom powder. Give a nice mix.


Add a little black pepper powder.


This gives a lovely flavour to the dish. This is purely optional. Now add the roasted dry fruits and mix everything well. Serve hot or at room temperature.


flatenned rice kesari recipe


Ingredients

Aval ( flattened rice ) 1 cup
Milk. 1 1/2 cups
Sugar 1/3 cup
Cardamom powder 1/4 tsp
Black pepper powder  pinch
Kesar colour  pinch
Dry fruits  1/4 cup

Method

  1. Soak almonds and remove the skin. Keep aside.
  2. Dry roast aval until crispy. Transfer to another plate.
  3. Add ghee in the pan and roast the dry fruits. Keep aside.
  4. Pour milk in the remaining ghee and let it become hot.
  5. Add crumbled aval and cook until soft.
  6. Add sugar and colour and mix well.
  7. Sprinkle cardamom powder and black pepper powder.
  8. Put the roasted dry fruits and switch off the flame.
  9. Serve hot, warm or at room temperature.

Notes

  • The sweet tends to thicken upon becoming cold. So add hot or warm milk just before serving.
  • You can also prepare aval kesari with water instead of milk. You might not get the richness when prepared with water.


Continue ...

pulihora making / pulihora recipe

0


Pulihora rice / Tiger Rice


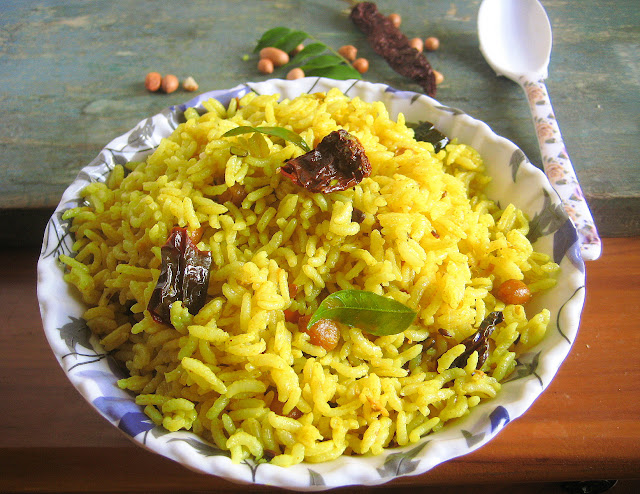
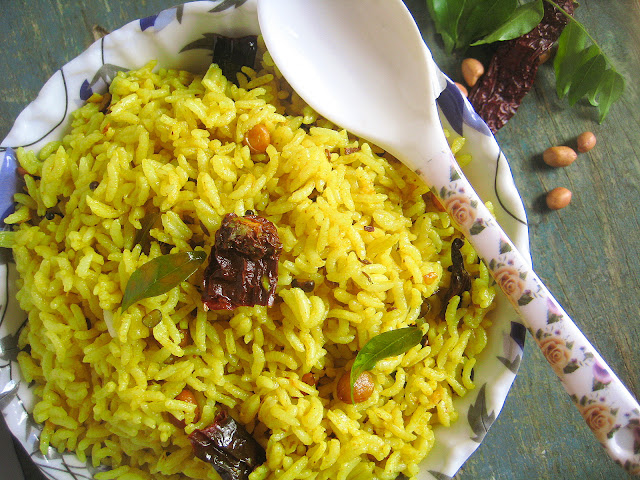
For the first day of Navrathri I have posted carrot kheer which tastes heavenly. For the second day of this Navrathri I am posting the most popular and famous yet simple dish of South India - Pulihora. Pulihora also known as tamarind rice in English is a must for any festival in South India especially in the Telugu states of Andhra and Telangana. Almost every household prepares this pulihora for any auspicious or festive occasions.

traditional pulihora


In my childhood days, my friends used to call this rice as tiger rice. Because puli means tiger in Telugu, hence the name. It indeed sounds very funny. My kids call it yellow rice. They always give names to the dishes with the colours they associate with. For example, they call palak rice as green rice, coriander rice as light green rice, beetroot rice as red rice, carrot rice as orange rice, etc.,.

tiger rice recipe


This tamarind rice is very simple and easy to prepare. Cook rice, do a little tempering and mix. That is it. Your dish is ready in minutes. The most important and crucial part of preparing this dish is the tempering. If the tempering is good, then only the dish will be perfect. You will not even ask for a side dish if the tempering is done well.  Pulihora is also one of the best lunch box idea recipes.

pulihora rice recipe


There are various versions of preparing pulihora. The version that I am presenting today is the most simple and easiest recipe. There are no masalas or spices that are added to this dish except that of ginger and garlic paste. There are other versions where you can add methi powder, coriander powder, cumin powder, etc.,. I will be discussing those recipes in another post. There is also a different version of preparing the temple style pulihora which I will be posting soon. But for today, I am finishing off with the most simplest version of preparing the yellow rice.


Preparation


Cook rice in a pressure cooker. Once the pressure is off, transfer the rice into a wide plate and allow to cool. Add 2 tsp of oil and gently mix without mashing the rice.


Extract juice from tamarind pulp and keep aside. Take a pan and add oil in it.


Once the oil is hot, add the mustard seeds, cumin seeds and methi seeds.


When the mustard seeds splutter, add peanuts and roast for 1 minute.


Now add the split urad dal. I have used to urad dal with the skin on it. You can use the normal ones which doesn’t have any skin on it. You can also add channa dal and moong dal as per your preference.


When the peanuts change to a light brown colour, add red chillies.


Fry for a minute and add hing and curry leaves.


Sauté for a minute and put the green chillies.


Give a nice mix and add the ginger garlic paste.


Mix well and put the turmeric powder.


Sauté for a minute and add tamarind juice and sugar. Also add salt and mix well.


Bring it to a boil. Cook until you see oil floating on the top.


At this stage, switch off the flame and pour it on the cooled rice.


Mix gently taking care not to mash or break the rice. If by any chance, lumps are formed in rice, mix with your hand breaking the lumps gently. 


Check for seasoning. If the sourness is not sufficient for you, you can add the juice of lemon. Else cook some more tamarind juice and add to the rice. Adjust salt and spice as per your taste and transfer to a serving bowl. This is served to God as Naivedhyam and can be enjoyed with family and friends. 

  
festive recipes


Ingredients


Rice 2 cups

Oil 3 tbsp.

Mustard seeds 1 tsp

Cumin seeds 1 tsp

Fenugreek seeds 1/4 tsp

Peanuts fistful

Split urad dal 1/2 tsp

Red chillies 3

Hing 1/4 tsp

Curry leaves few sprigs

Green chillies 4-5

Ginger garlic paste 2 tsp

Turmeric 1/2 tsp

Tamarind  Juice extracted from the size of 2 lemons 

Salt to taste

Sugar 1 tsp


Method


  1. Extract juice from tamarind and keep aside. 
  2. Cook rice and transfer to a wide plate to cool.
  3. Take oil in a pan for tempering. 
  4. Add mustard seeds, cumin seeds and fenugreek seeds. 
  5. Once they splutter, add peanuts and urad dal. Any kind of lentils can be added according to your desire. 
  6. When the peanuts change colour, add red chillies and hing.
  7. Sauté for a minute and add curry leaves. 
  8. Cook for a minute and add green chillies. 
  9. Mix well and add ginger garlic paste. 
  10. Saute for 2 minutes and add turmeric powder. 
  11. Mix well and finally pour the tamarind juice with salt and sugar. 
  12. Cook until you see oil floating on the top ( uncovered ). 
  13. When you see oil floating, switch off the flame. 
  14. Pour this tempering on the cooled rice.
  15. Mix gently without breaking or mashing the rice. 
  16. Adjust salt, spice and sourness and take it into a serving bowl.
  17. Serve hot with plain curd, raita or any masaledaar curry.


Notes


  • Tempering should be done very well for the best taste of pulihora.
  • Any kind or all kinds of lentils can be added according to your likes or availability. 
  • Adding sugar will enhance the taste of the pulihora cutting out on the sourness of the tamarind. 
  • Salt, spice and sourness should be perfect for the dish, else you will have to compromise on the taste.
  • Other versions of pulihora will be discussed very soon. Watch this space for more.


Continue ...

Banana Appalu/Aratipandu Appalu

0


Banana Appalu / Aratipandu Appalu


applau made with banana

I always stock up on fruits in my house. They are very healthy snacks and I usually rely on them for a snack break for my kids or an evening snack for myself. The must-have fruits in my kitchen are bananas and apples, apart from the seasonal fruits. Bananas 🍌have a short shelf life due to which they tend to become dark black on the outer skin and very soft in the inside. No one dares to touch those kind of bananas in my family including me. But then, I cannot
Continue ...